

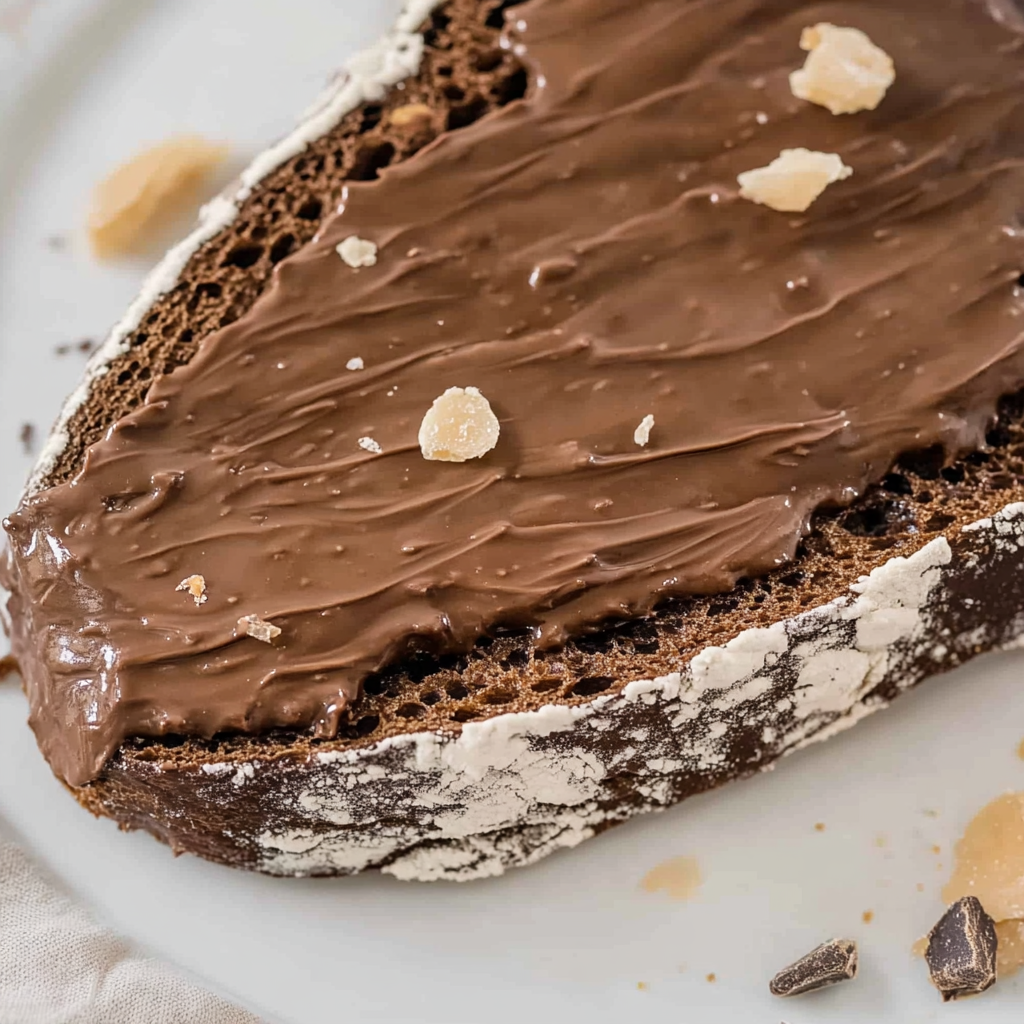
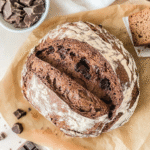
There’s something comforting about a loaf of fresh bread cooling on the counter, and this Chocolate No Knead Bread brings that feeling to a whole new level. It has a deep cocoa flavor, a soft interior, and just the right amount of sweetness. Because it uses sourdough starter instead of yeast, the flavor becomes fuller and more complex, giving the loaf a bakery-style richness that feels warm and homemade.
This recipe is built around a slow, hands-off method. You mix everything in one bowl, step away, and let the long fermentation do its job. The sourdough starter adds a gentle tang that pairs beautifully with chocolate. It also creates a tender texture that feels almost like a rustic dessert bread. If you enjoy no knead recipes that don’t require special tools or tricky shaping, this one fits right in. You don’t need a mixer, kneading skills, or any prior sourdough experience.
Chocolate No Knead Bread works for breakfast, snacks, or a cozy evening treat. Toast it, spread butter on it, or enjoy it plain. It looks fancy but comes together with simple pantry ingredients. The slow fermentation builds the flavor while you sleep or go about your day. In the end, you get a loaf that smells like a small bakery and tastes like a chocolate dream. If you love chocolate, sourdough, or easy bread recipes, you’ll enjoy this loaf from the first warm slice to the last crumb.
What Makes This Chocolate No Knead Bread Special?
Deep flavor from natural fermentation
The sourdough starter gives the bread a rich flavor that develops over many hours without extra effort.
Easy, hands-off method
No kneading required. You mix the dough, cover it, and forget about it until it’s ready.
Soft and chocolatey crumb
The cocoa blends with the natural tang of sourdough for a balanced taste that isn’t overly sweet.
Minimal equipment needed
A bowl, a spoon, and a Dutch oven are usually all you need.
Time-saving workflow
The long rise means you can prepare the dough the night before and bake it in the morning (perfect when you want warm bread without a long prep session).
This recipe is great for anyone wanting a chocolate loaf with artisan texture but without the fuss of kneading or complicated shaping. The sourdough method adds a special touch that makes the loaf feel unique without adding extra work.
Ingredient Notes
• Sourdough starter (100% hydration): The heart of this recipe. It helps the dough rise and adds a mild tang. Active starter works best, but a slightly sluggish one still performs well in long fermentation.
• All-purpose flour: Gives the bread structure. You can swap up to 25% with bread flour for a chewier texture.
• Cocoa powder: Use unsweetened cocoa for the best flavor. Dutch-processed cocoa gives a deeper color and smoother taste, while natural cocoa delivers a lighter tone and sharper flavor.
• Warm water: Helps hydrate the flour and activate fermentation. Avoid hot water, as it can slow down or damage the starter.
• Sugar: Adds a touch of sweetness to balance the cocoa and helps browning. Honey or maple syrup can be used instead (reduce water by 1 tablespoon).
• Salt: Enhances flavor and helps with dough structure.
• Chocolate chips or chunks: Optional but highly recommended for extra chocolate pockets. Dark, milk, or semi-sweet all work well.
• Olive oil (optional): Adds softness and moisture. Can be replaced with melted butter for a richer crumb.
• Dutch oven: Helps create steam during baking so the loaf rises well and forms a crust.
How To Make Chocolate No Knead Bread
1. Mix the dough
Combine your sourdough starter, warm water, flour, cocoa, sugar, and salt in a large bowl. Stir until everything comes together and no dry spots remain. The dough will be sticky, which is normal. Do not add extra flour. Stir in chocolate chips if using.
2. Cover and rest (bulk fermentation)
Cover the bowl with plastic wrap or a damp towel. Let the dough rest at room temperature for 10 to 14 hours. The dough should double and show small air bubbles. A long fermentation gives the bread its signature flavor, so don’t rush this step.
3. Shape the dough gently
Once risen, lightly flour your hands and scoop the dough onto a floured surface. Gently shape it into a round loaf. You don’t need to knead. Simply tuck the sides under until the top looks smooth.
4. Second rise
Place the shaped dough in a floured proofing basket or a bowl lined with floured cloth. Let it rise for 1 to 2 hours. The dough should puff slightly. Do not expect a huge rise because cocoa naturally reduces gluten strength.
5. Preheat your oven
Place your Dutch oven in the oven and heat to 450°F (230°C). Preheating ensures you get the steam needed for a good crust.
6. Transfer dough
Carefully remove the hot Dutch oven. Place the dough inside using parchment paper to avoid burns. Score the top with a sharp blade so the bread expands cleanly.
7. Bake
Bake covered for 25 minutes. Remove the lid and bake for another 15 to 20 minutes. The top should look dark but not burnt. The loaf should feel firm and sound hollow when tapped.
8. Cool
Let the bread cool fully before slicing. Cutting too early can create a gummy texture because the crumb is still setting.
Storage Options
• Room temperature: Store in an airtight bag for 2 to 3 days. Avoid leaving it exposed since cocoa-based breads dry faster.
• Refrigeration: Not recommended because it makes the crumb firm, but you can refrigerate for up to 1 week if needed.
• Freezing: Freeze whole or sliced for up to 3 months. Wrap in plastic and place in a freezer bag.
• Reheating: Toast slices or warm in a 300°F (150°C) oven for 5 to 8 minutes.
Variations and Substitutions
• Add orange zest for a bright chocolate-orange flavor.
• Use espresso powder for a deeper and more intense chocolate taste.
• Swap chocolate chips for chopped hazelnuts or almonds.
• Make a holiday version with cinnamon, nutmeg, and dried cherries.
• Add vanilla extract for a softer, sweeter aroma.
Dietary modifications: Use coconut sugar instead of white sugar. Replace chocolate chips with dairy-free chips to keep the recipe dairy-free.
Seasonal adaptations: Add raspberries in summer (fold in frozen berries gently). Add peppermint chips in winter.
Frequently Asked Questions
Why didn’t my dough rise much?
Cocoa can make dough denser. As long as you see bubbling and mild expansion, it typically rises fine during baking.
Can I use a weak starter?
Yes. The long fermentation helps even a slightly underfed starter work well.
Can I make the dough ahead?
Yes. Mix the dough and refrigerate it for up to 24 hours after the bulk rise.
Can I reduce the sweetness?
Yes. Lower the sugar by half without changing structure.
Why is my loaf gummy inside?
It likely needed more cooling time. Let it rest fully before slicing.
Can I add fillings like nuts or fruit?
Yes. Fold them in with the chocolate chips during mixing.
Conclusion
Chocolate No Knead Bread is one of those recipes that feels simple but tastes special. The slow sourdough fermentation gives it a rich, deep flavor without any complicated work. With only a few steps and ingredients, you get a warm, chocolatey loaf that fits breakfast, snacks, or cozy nights at home. If you bake it, share your results with friends or family — fresh bread always brings people together.
PrintChocolate No Knead Bread
- Prep Time: 15 minutes
- Cook Time: 45 minutes
- Total Time: 1 hour
- Yield: 1 loaf
Ingredients
Sourdough starter, warm water, all-purpose flour, cocoa powder, sugar, salt, chocolate chips, olive oil (optional)
Instructions
Mix all ingredients. Let rise for 10 to 14 hours. Shape gently and rest again. Bake in a Dutch oven at 450°F. Cool before slicing.
Notes
Use Dutch-processed cocoa for deeper flavor. Add nuts or dried fruit. Let the loaf cool fully for best texture.
Nutrition
- Calories: 190
- Fat: 6g
- Carbohydrates: 32g
- Protein: 4g