

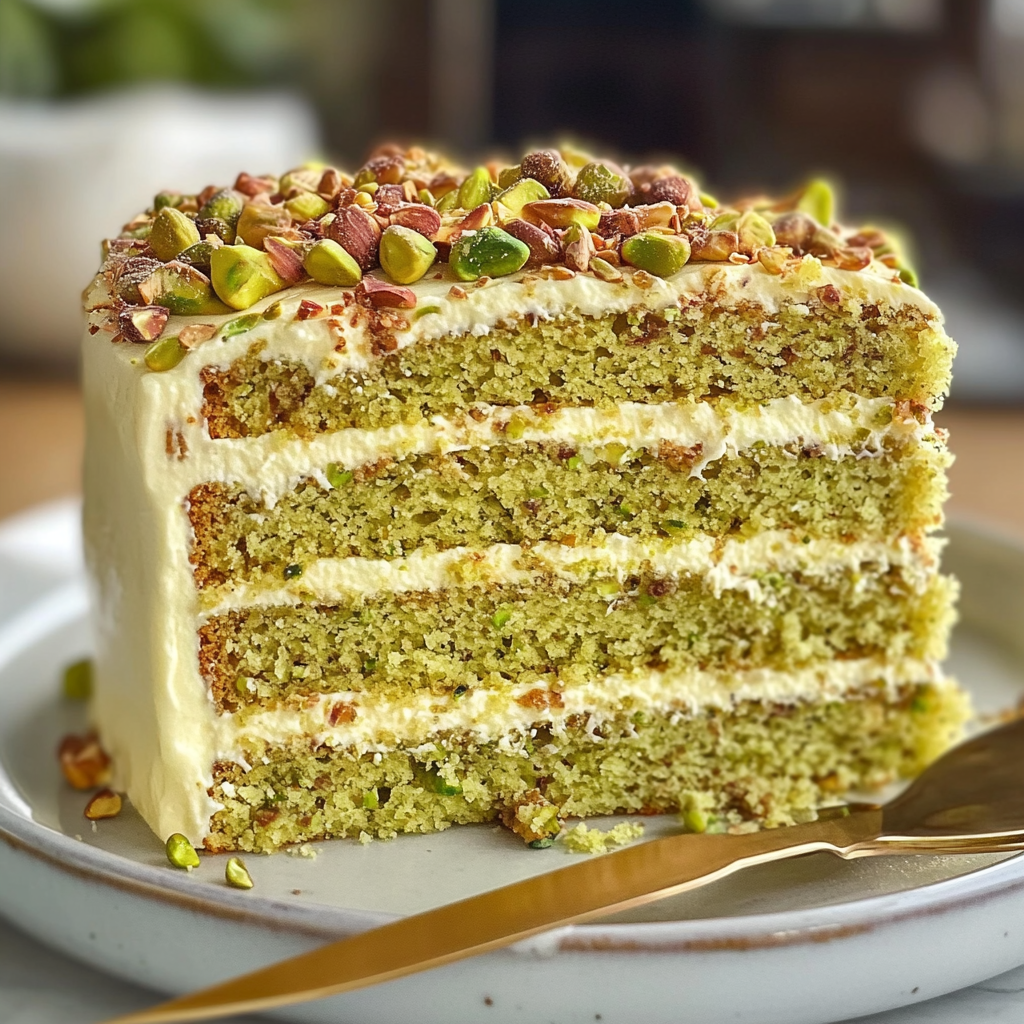
If you love soft, moist cakes with rich but balanced flavors, this Pistachio Mascarpone Layer Cake will win you over from the very first bite. I created this recipe after wanting a cake that felt special enough for celebrations but simple enough to bake on a quiet weekend. The light crumb, nutty pistachio layers, and silky mascarpone frosting come together in a way that feels both elegant and comforting. And because this recipe is easy to follow, anyone can make it—even if you’re not a confident baker yet. The focus keyphrase, Pistachio Mascarpone Layer Cake, describes this dessert perfectly: a tender pistachio-infused cake stacked with creamy, lightly sweet mascarpone filling that never feels heavy.
One reason I love this cake is that it uses real pistachios instead of artificial flavoring. Grinding your own nuts takes just a minute, and the payoff is huge. The mascarpone frosting also gives the cake a fresh, airy texture that whipped buttercream can’t match. It’s the kind of frosting that spreads like a dream and tastes like something from a bakery.
Whether you’re planning a birthday dessert, a holiday treat, or a weekend bake to pair with coffee, this cake is versatile enough to fit the moment. It slices beautifully, stores well, and looks stunning with just a sprinkle of chopped pistachios. This is the kind of cake you make once and immediately add to your “favorites” list.
What Makes This Pistachio Mascarpone Layer Cake Special?
• Real pistachio flavor comes from ground pistachios, not extracts. This adds color, aroma, and a deeper nutty taste.
• Silky mascarpone frosting gives you a light, cloud-like texture that’s not overly sweet.
• Moist, tender crumb thanks to the mix of oil and butter, which keeps the cake soft for days.
• Beginner-friendly technique makes this cake easy even for first-time bakers.
• Naturally elegant look that requires minimal decorating skills (a dusting of pistachios is enough).
Why you should try it: this recipe balances flavor and simplicity. It uses accessible ingredients, only requires standard baking tools, and includes several time-saving tricks (like making the frosting in one bowl and baking all layers at once if you prefer). The method is forgiving, so even if you’re still learning how to bake layered cakes, you’ll get beautiful results.
Ingredient Notes
• Pistachios: Use unsalted, shelled pistachios. You’ll grind them into a fine meal. If you can’t find pistachios, you can substitute a portion with almond flour, but the flavor will change.
• All-purpose flour: Provides structure. Avoid cake flour here because it makes the layers too delicate to stack.
• Butter and oil: Butter adds flavor, while oil keeps the cake moist. Using both makes a balanced, tender texture.
• Eggs: Help the cake rise and add richness. Use room-temperature eggs for smoother mixing.
• Mascarpone: This soft Italian cheese creates creamy frosting without being heavy. If you can’t find mascarpone, substitute half cream cheese and half heavy cream.
• Granulated sugar: Sweetens the cake without overpowering the pistachios.
• Buttermilk: Adds moisture and a slight tang. Substitute with milk plus a teaspoon of lemon juice if needed.
• Vanilla extract: Enhances the flavor of the mascarpone frosting.
• Baking powder + baking soda: Provide lift. Make sure they’re fresh for best results.
• Salt: Brings out the natural pistachio flavor.
• Special equipment: Food processor to grind the pistachios; 8-inch cake pans for even layers.
How To Make Pistachio Mascarpone Layer Cake
1. Prep Your Pans and Oven
Preheat your oven to 350°F (175°C). Line two or three 8-inch round cake pans with parchment and grease the sides. Proper prep helps the cake release cleanly.
2. Grind the Pistachios
Place the pistachios in a food processor and blend until they form a fine meal. Stop before it becomes paste. Fine crumbs mix easily into the batter and give the cake color.
3. Mix the Dry Ingredients
In a bowl, whisk the flour, ground pistachios, baking powder, baking soda, and salt. This keeps the crumb even and prevents lumps.
4. Cream the Butter and Sugar
Beat the butter and sugar together for 2–3 minutes until light and fluffy. This step gives the cake lift and a delicate texture.
5. Add the Oil and Eggs
Add the oil and mix until combined. Add eggs one at a time, mixing until smooth. The batter may look slightly separated—this is normal.
6. Combine Wet and Dry
Add half of the dry ingredients, then the buttermilk, then the remaining dry mix. Don’t overmix. Stop when you no longer see flour streaks.
7. Bake the Layers
Pour batter into the pans and smooth the tops. Bake 22–26 minutes, depending on your oven. The cakes should spring back when touched and pull from the edges slightly.
8. Make the Mascarpone Frosting
In a cold bowl, beat mascarpone, heavy cream, powdered sugar, and vanilla. Whip until soft peaks form. Stop once thick—overbeating can cause separation.
9. Assemble the Cake
Level the cakes if needed. Spread frosting between each layer, then coat the outside. Chill the cake for 20–30 minutes to help it set.
10. Decorate
Add chopped pistachios around the edges or on top. A light drizzle of honey adds shine.
Storage Options
• Room temperature: Keep the cake out for up to 6 hours if your kitchen isn’t too warm.
• Refrigeration: Store tightly covered for 3–4 days. The cake stays moist thanks to the oil and mascarpone.
• Freezing: Freeze unfrosted layers up to 3 months. Wrap tightly. Frosting can be made fresh.
• Reheating: For leftover slices, let them sit at room temp for 20 minutes to soften.
Variations and Substitutions
• Lemon pistachio version: Add lemon zest to the batter and frosting.
• Chocolate pistachio layer cake: Add cocoa powder to one layer for a two-tone cake.
• Gluten-free option: Use a high-quality gluten-free flour blend.
• Orange blossom mascarpone: Add a splash of orange blossom water for a floral note.
• Berry filling: Spread raspberry jam between layers for tart contrast.
Frequently Asked Questions
1. Can I use pistachio paste instead of ground pistachios?
Yes, but reduce the oil slightly. Pistachio paste adds moisture.
2. Why did my cake turn out dense?
You may have overmixed or measured flour incorrectly. Light whisking avoids this.
3. Can I make the frosting ahead?
Yes. Keep it chilled, but re-whip briefly before using.
4. Can this cake be made as cupcakes?
Yes. Bake at 350°F for 18–20 minutes.
5. How do I keep the layers from sliding?
Chill the cake after filling each layer. Cold frosting grips better.
6. Can I dye the frosting green?
Yes. Use gel food coloring for a natural shade.
Conclusion
This Pistachio Mascarpone Layer Cake is the kind of recipe that turns any day into a celebration. The nutty flavor, creamy frosting, and soft layers come together into a dessert that feels indulgent but still easy to make. I hope you try it, share it, and enjoy every bite. Let me know how your cake turns out—I’d love to see it!
PrintPistachio Mascarpone Layer Cake

A light, moist pistachio cake filled with creamy mascarpone frosting. This recipe is simple, elegant, and perfect for birthdays or weekend baking.
- Prep Time: 25 minutes
- Cook Time: 25 minutes
- Total Time: 50 minutes
- Yield: 10–12 servings
Ingredients
• 1 ½ cups ground pistachios
• 2 cups all-purpose flour
• 1 cup sugar
• ½ cup butter
• ½ cup oil
• 3 eggs
• 1 cup buttermilk
• 1 tbsp vanilla
• 2 tsp baking powder
• ½ tsp baking soda
• ½ tsp salt
• 1 cup mascarpone
• 1 cup heavy cream
• ½ cup powdered sugar
• 1 tsp vanilla
Instructions
-
Heat oven to 350°F. Line round pans.
-
Grind pistachios into fine meal.
-
Mix flour, pistachios, baking powder, soda, and salt.
-
Cream butter and sugar. Add oil and eggs.
-
Add dry mix, then buttermilk, then remaining dry mix.
-
Bake 22–26 minutes. Cool.
-
Whip mascarpone, cream, powdered sugar, and vanilla.
-
Frost layers and chill.
Notes
• Add lemon zest for brightness.
• Use almond flour if pistachios are unavailable.
Nutrition
- Calories: 430
- Fat: 27g
- Carbohydrates: 42g
- Protein: 6g