

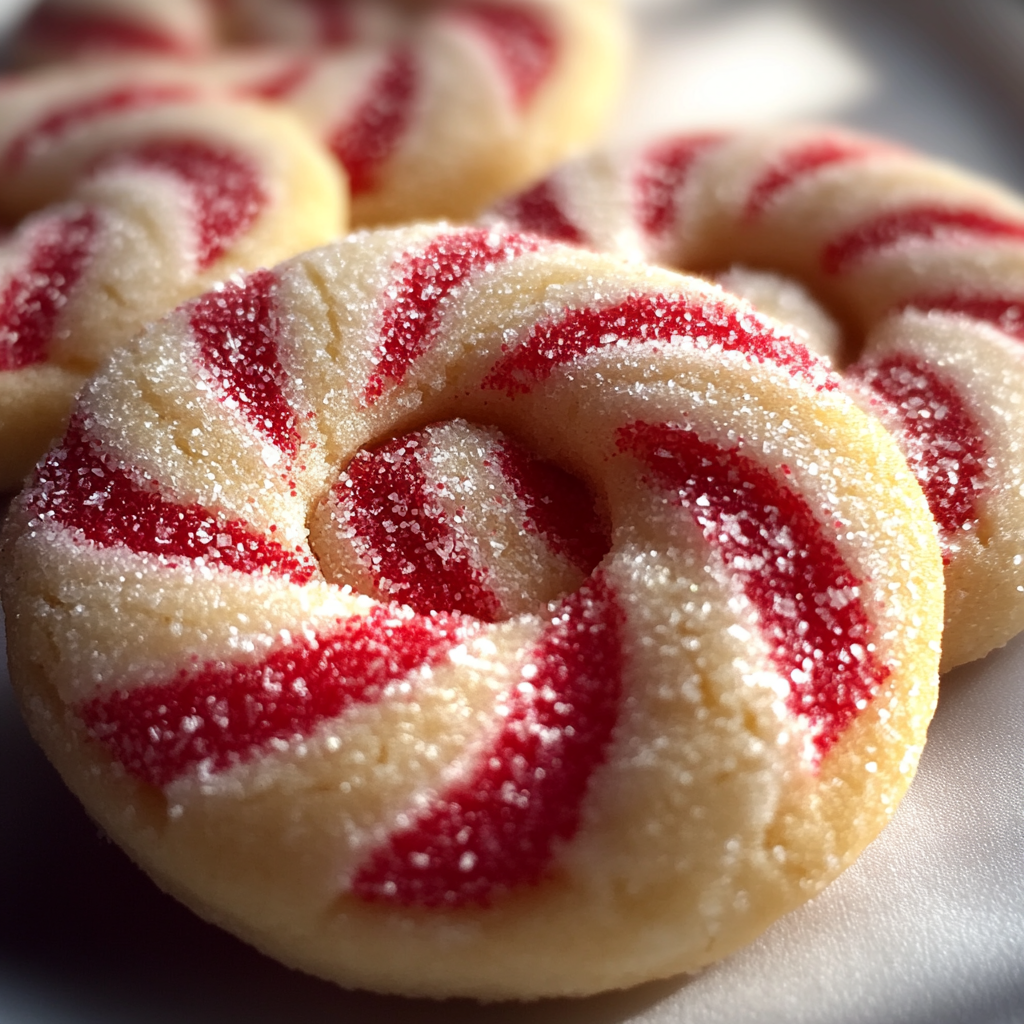
There’s something special about holiday baking that turns even the simplest recipe into a memory. The Magic of Candy Cane Cookies captures that feeling from the very first bite. These festive peppermint cookies look just like real candy canes with their red and white twists, but they taste even better. The buttery vanilla dough mixes with a light peppermint aroma, creating a cookie that feels cozy, nostalgic, and perfect for the season. If you’re searching for a treat that stands out on holiday dessert tables, this is the one to bake.
I love this recipe because it feels like a little craft project in the kitchen. Twisting the dough into candy cane shapes is fun and surprisingly relaxing. Kids love helping, and adults enjoy the creativity that comes with shaping each cookie. The Magic of Candy Cane Cookies also bring color to any cookie plate without needing icing, sprinkles, or complicated decorations. They’re naturally eye-catching and look like you spent much more time on them than you did.
The peppermint flavor stays light enough for those who don’t like overpowering mint, but you can always add more if you want a stronger holiday punch. These cookies stay soft for days and pack beautifully in cookie boxes, making them a great choice for gifting. If you want a festive treat that blends tradition, flavor, and fun—these Magic of Candy Cane Cookies belong in your holiday baking lineup.
What Makes This Magic of Candy Cane Cookies Recipe Special?
Festive and Eye-Catching
These cookies look like real candy canes thanks to their red and white twist. No frosting needed—just simple dough that looks naturally beautiful.
Light Peppermint Flavor
The cookies have a soft, buttery base with just enough peppermint to feel Christmassy without being strong or bitter.
Fun to Shape
Twisting the dough into candy canes is like edible art. Kids especially enjoy this step, and the dough is soft enough to shape easily.
Perfect for Gifting
These cookies stay soft and hold their shape well, making them great for cookie boxes, holiday swaps, and party platters.
Make-Ahead Friendly
The dough freezes well, and the cookies store beautifully. You can shape them days ahead, then bake fresh for events.
This recipe combines creativity with simple ingredients, making it the perfect holiday baking project when you want something special without the stress.
Ingredient Notes
• Butter
Adds richness and structure. Use unsalted butter for best flavor.
Substitute: Salted butter (but reduce added salt).
• Sugar
Provides sweetness and helps create a soft texture.
Avoid substituting brown sugar—it changes the dough color and structure.
• Eggs
Bind the dough and add moisture. Room temperature eggs mix more smoothly.
• Vanilla Extract
Adds warmth and balances the peppermint flavor.
Substitute: Almond extract for a different holiday twist.
• Peppermint Extract
Gives the cookies their signature candy cane flavor. Use sparingly—peppermint is strong.
• All-Purpose Flour
The base of the dough. Keep measurements exact so the dough doesn’t become crumbly.
• Baking Powder
Helps the cookies rise slightly and stay soft.
• Salt
Simple but essential for balancing sweetness.
• Red Food Coloring
Creates the iconic candy cane color. Gel food coloring works best for vibrant red.
Equipment tip: A silicone baking mat or parchment paper helps cookies keep their shape while baking.
How To Make Magic of Candy Cane Cookies
1. Mix the Wet Ingredients
Beat softened butter and sugar together until creamy. This takes about 2–3 minutes.
Add the egg and vanilla, then mix until smooth.
Tip: Cream the butter fully—this helps the cookies stay tender.
2. Add Dry Ingredients
In a separate bowl, whisk flour, baking powder, and salt.
Add to the butter mixture a little at a time.
Tip: Stop mixing as soon as the flour disappears to avoid tough dough.
3. Flavor and Divide the Dough
Add peppermint extract and stir until combined.
Divide dough into two equal portions.
Color one portion with red food coloring. Start with a few drops and adjust.
4. Shape the Candy Canes
Roll a small amount of white dough into a thin rope, about 4–5 inches long.
Do the same with a piece of red dough.
Twist the ropes together gently, then bend the top to form a candy cane hook.
Tip: If dough cracks, warm it slightly in your hands.
5. Chill Before Baking
Place shaped cookies on a baking sheet and chill for 15–20 minutes.
This helps them hold their shape in the oven.
6. Bake
Preheat oven to 350°F (177°C).
Bake cookies for 8–10 minutes or until edges are set.
Look for slight firmness along the edges while the centers remain soft.
7. Cool and Serve
Allow cookies to cool on the baking sheet for a few minutes before moving to a rack.
Storage Options
Room Temperature
Store cookies in an airtight container for 4–5 days.
Tip: Place a slice of bread inside to keep them soft.
Refrigeration
Keeps cookies fresh for up to 7 days without drying out.
Freezing Dough
Shape into candy canes, freeze on a tray, then store in bags for 3 months.
Bake straight from the freezer—just add 1–2 extra minutes.
Freezing Baked Cookies
Freeze fully cooled cookies for 2–3 months.
Layer with parchment to prevent sticking.
Reheating
Warm for 10 seconds in the microwave for a soft, buttery bite.
Variations and Substitutions
• Chocolate Candy Cane Cookies
Add cocoa powder to the red dough for a chocolate-peppermint twist.
• Sparkling Candy Canes
Roll cookies in sanding sugar before baking for extra sparkle.
• Lemon Candy Cane Cookies
Replace peppermint with lemon extract for a bright flavor.
• Gluten-Free Version
Use 1:1 gluten-free flour blend.
• Almond Twist
Swap peppermint extract for almond extract and keep the color pattern.
• Classic Shortbread Style
Remove the egg for a crumblier, buttery shortbread cookie.
Frequently Asked Questions
Why is my dough too dry?
You may have added too much flour. Add a teaspoon of milk to soften it.
My dough is too sticky. What should I do?
Chill it for 15 minutes or add 1–2 tablespoons of flour.
Can I double the recipe?
Yes, it doubles well. Just keep the dough portions equal so the colors twist nicely.
Can I skip the peppermint?
Yes. Use vanilla or almond extract for a different flavor.
Why did my cookies lose their shape?
They needed more chilling before baking.
Can the dough rest overnight?
Yes, wrap tightly and refrigerate up to 24 hours. Bring to room temperature before shaping.
Can I use liquid food coloring?
Yes, but you may need more to get a bright red. Gel food coloring works best.
Conclusion
These Magic of Candy Cane Cookies bring color, flavor, and fun to your holiday season. They’re great for gifting, sharing, or baking with family. Whether you’re an experienced baker or new to holiday cookies, the shaping process feels creative and joyful. Give them a try, and share your results—these cookies always bring smiles.
PrintMagic of Candy Cane Cookies
Magic of Candy Cane Cookies are festive peppermint treats shaped like classic candy canes. With soft red and white dough twisted into colorful spirals, they bring fun and charm to any holiday table. The cookies are buttery, lightly flavored with peppermint, and easy to make. Kids love helping twist the dough, and the cookies bake quickly, making them perfect for busy December days. They’re great for gifting, storing, and freezing for later.
- Prep Time: 20 minutes
- Cook Time: 10 minutes
- Total Time: 30 minutes
- Yield: 24 cookies
Ingredients
Butter
Sugar
Egg
Vanilla extract
Peppermint extract
Flour
Baking powder
Salt
Red food coloring
Instructions
Beat butter and sugar until creamy.
Add egg, vanilla, and peppermint.
Mix dry ingredients and combine.
Divide dough and color half red.
Roll ropes, twist together, and shape into candy canes.
Chill and bake at 350°F for 8–10 minutes.
Notes
Chill shaped cookies so they keep their form.
Add more peppermint for stronger flavor.
Freeze shaped dough for up to three months.
Nutrition
- Calories: 90
- Sugar: 6g
- Fat: 4g
- Carbohydrates: 11g
- Protein: 1g